


Earth Gravity Filter - Instructions
Welcome to Weeplow
Congratulations — you've made a thoughtful investment in cleaner, better-tasting water for your home.
Whether you're looking to reduce bottled water, build healthier habits, or simply enjoy greater peace of mind about the water you drink every day, you've taken an important step.
This guide will walk you through setting up your system, preparing your filters for first use, and keeping everything running smoothly for years to come.
Let's get started.

Quick start
1. Install the spigot
2. Prime both filters before installation
3. Install the filters in the upper chamber
4. Assemble the upper and lower chambers
5. Fill the upper chamber with water
6. Run 2–3 full filtration cycles and discard the water
7. Enjoy your filtered water
Before installing the filters, they must be fully primed. This allows water to flow through the filter media correctly and ensures optimal filtration performance from the start.
You can prime your filters using the faucet method shown in the setup video or by soaking them in clean water for approximately 60 minutes.
Watch setup video
See how to assemble, prime, and prepare your Weeplow system for first use.
Step-by-step setup guide
Step 1: Install the spigot
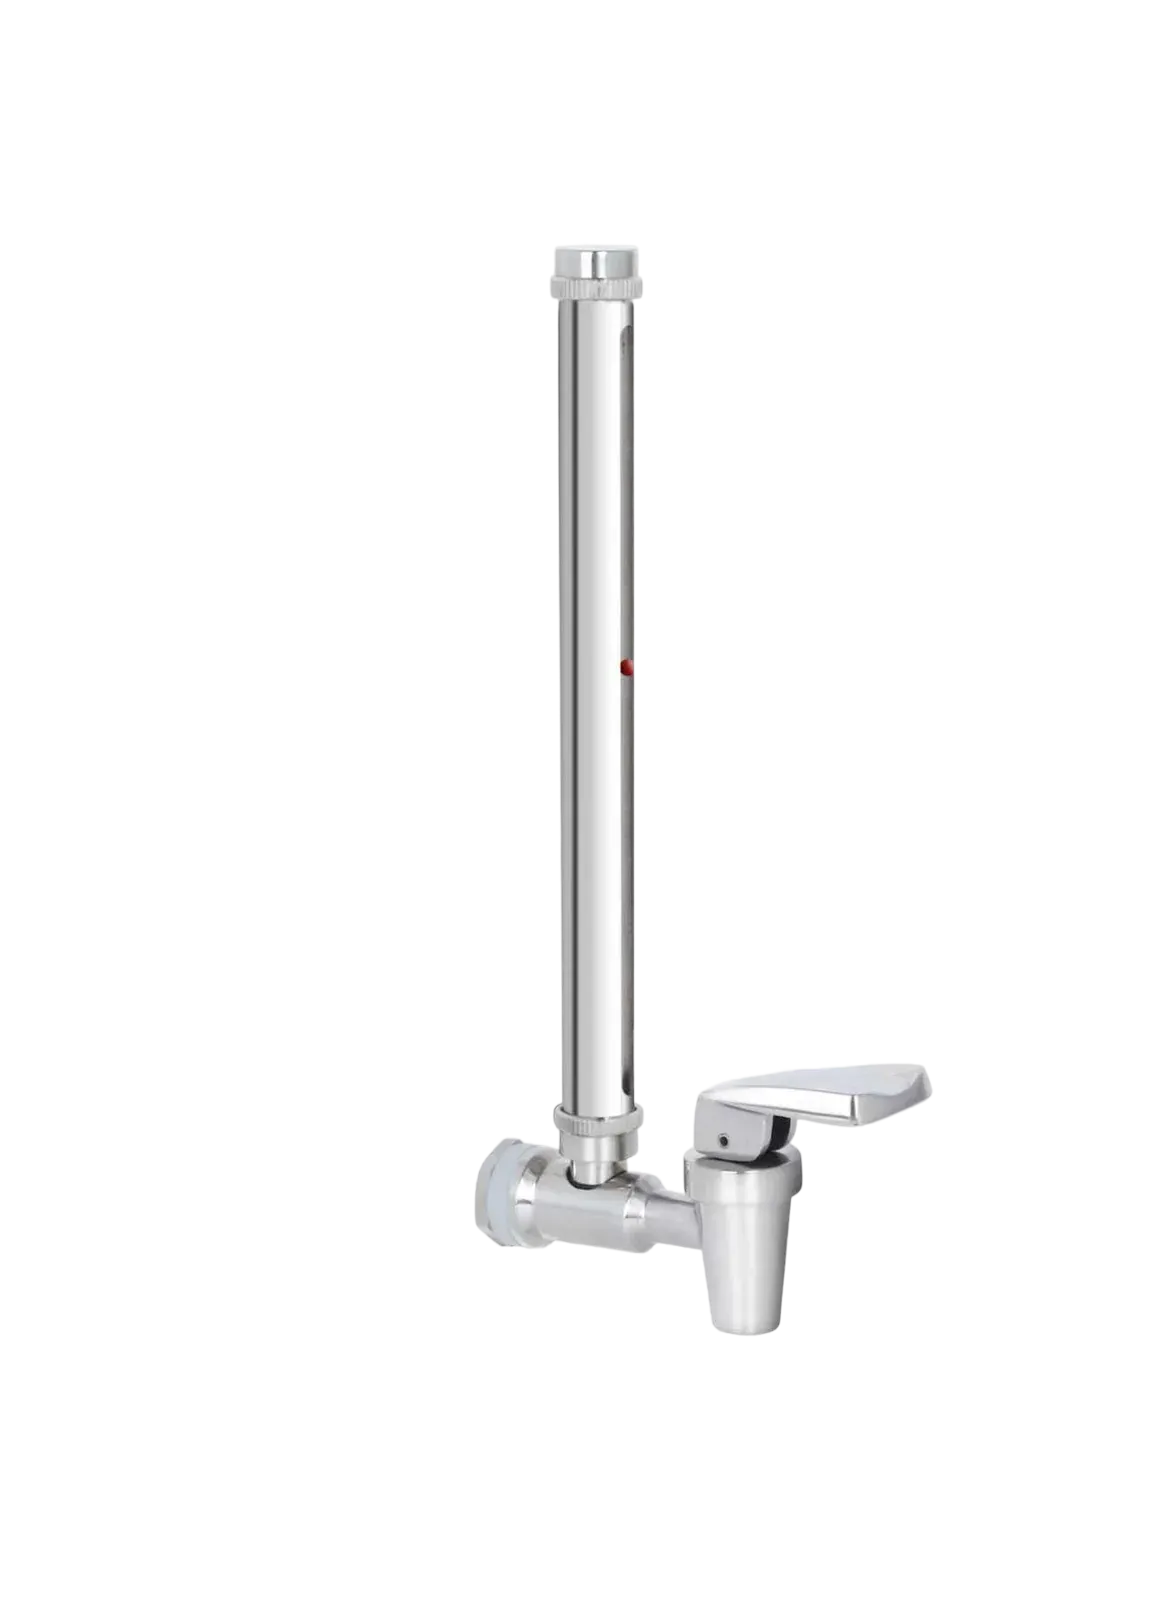
Locate the stainless steel spigot, two rubber gaskets, metal washer, locking nut, and the supplied wrench.
1. Leave one rubber gasket positioned on the outside of the spigot.
2. Insert the spigot through the opening in the lower chamber from the outside.
3. From inside the chamber, slide the second rubber gasket onto the threaded stem (the metal post extending from the back of the spigot).
4. Place the metal washer onto the threaded stem.
5. Thread the locking nut onto the stem and tighten by hand.
6. Use the supplied wrench to fully secure the assembly.
Once installed, check that the spigot is straight and firmly attached. Do not overtighten.
Step 2: Prime the filters
Priming the filters before installation is essential for proper filtration performance.
For best results, use the faucet priming method:
1. Place the supplied beige priming seal onto the threaded stem of the filter.
2. Hold the filter firmly against the end of the tap* to create a watertight seal.
3. Turn on the water slowly so a steady stream enters the filter.
4. Continue priming for approximately 2 minutes.
As the filter becomes saturated, water droplets will begin to appear on the outside surface of the filter. This indicates that water has fully penetrated the filter media and that the filter is properly primed for installation.
Repeat this process for each filter before installation.
* If your tap has an aerator fitted, unscrew and remove it first.
Alternative method
If faucet priming is not possible, fully submerge the filter in clean water for approximately 60 minutes.
Step 3: Install the filters
Once the filters have been primed:
1. Remove the retaining nut from the threaded stem of the filter.
2. The sealing washer should already be fitted to the filter stem. Before installation, ensure it remains positioned between the filter and the inside of the upper chamber around the filter opening.
3. Insert the filter through one of the filter openings in the upper chamber.
4. From underneath, reinstall the retaining nut.
5. Tighten firmly by hand.
6. Install the second filter in the opening directly opposite the first filter. Positioning the filters opposite one another helps ensure even filtration and water distribution within the chamber.
7. Insert the supplied rubber plugs into the two remaining unused holes to create a watertight seal.
Step 4: Assemble the system
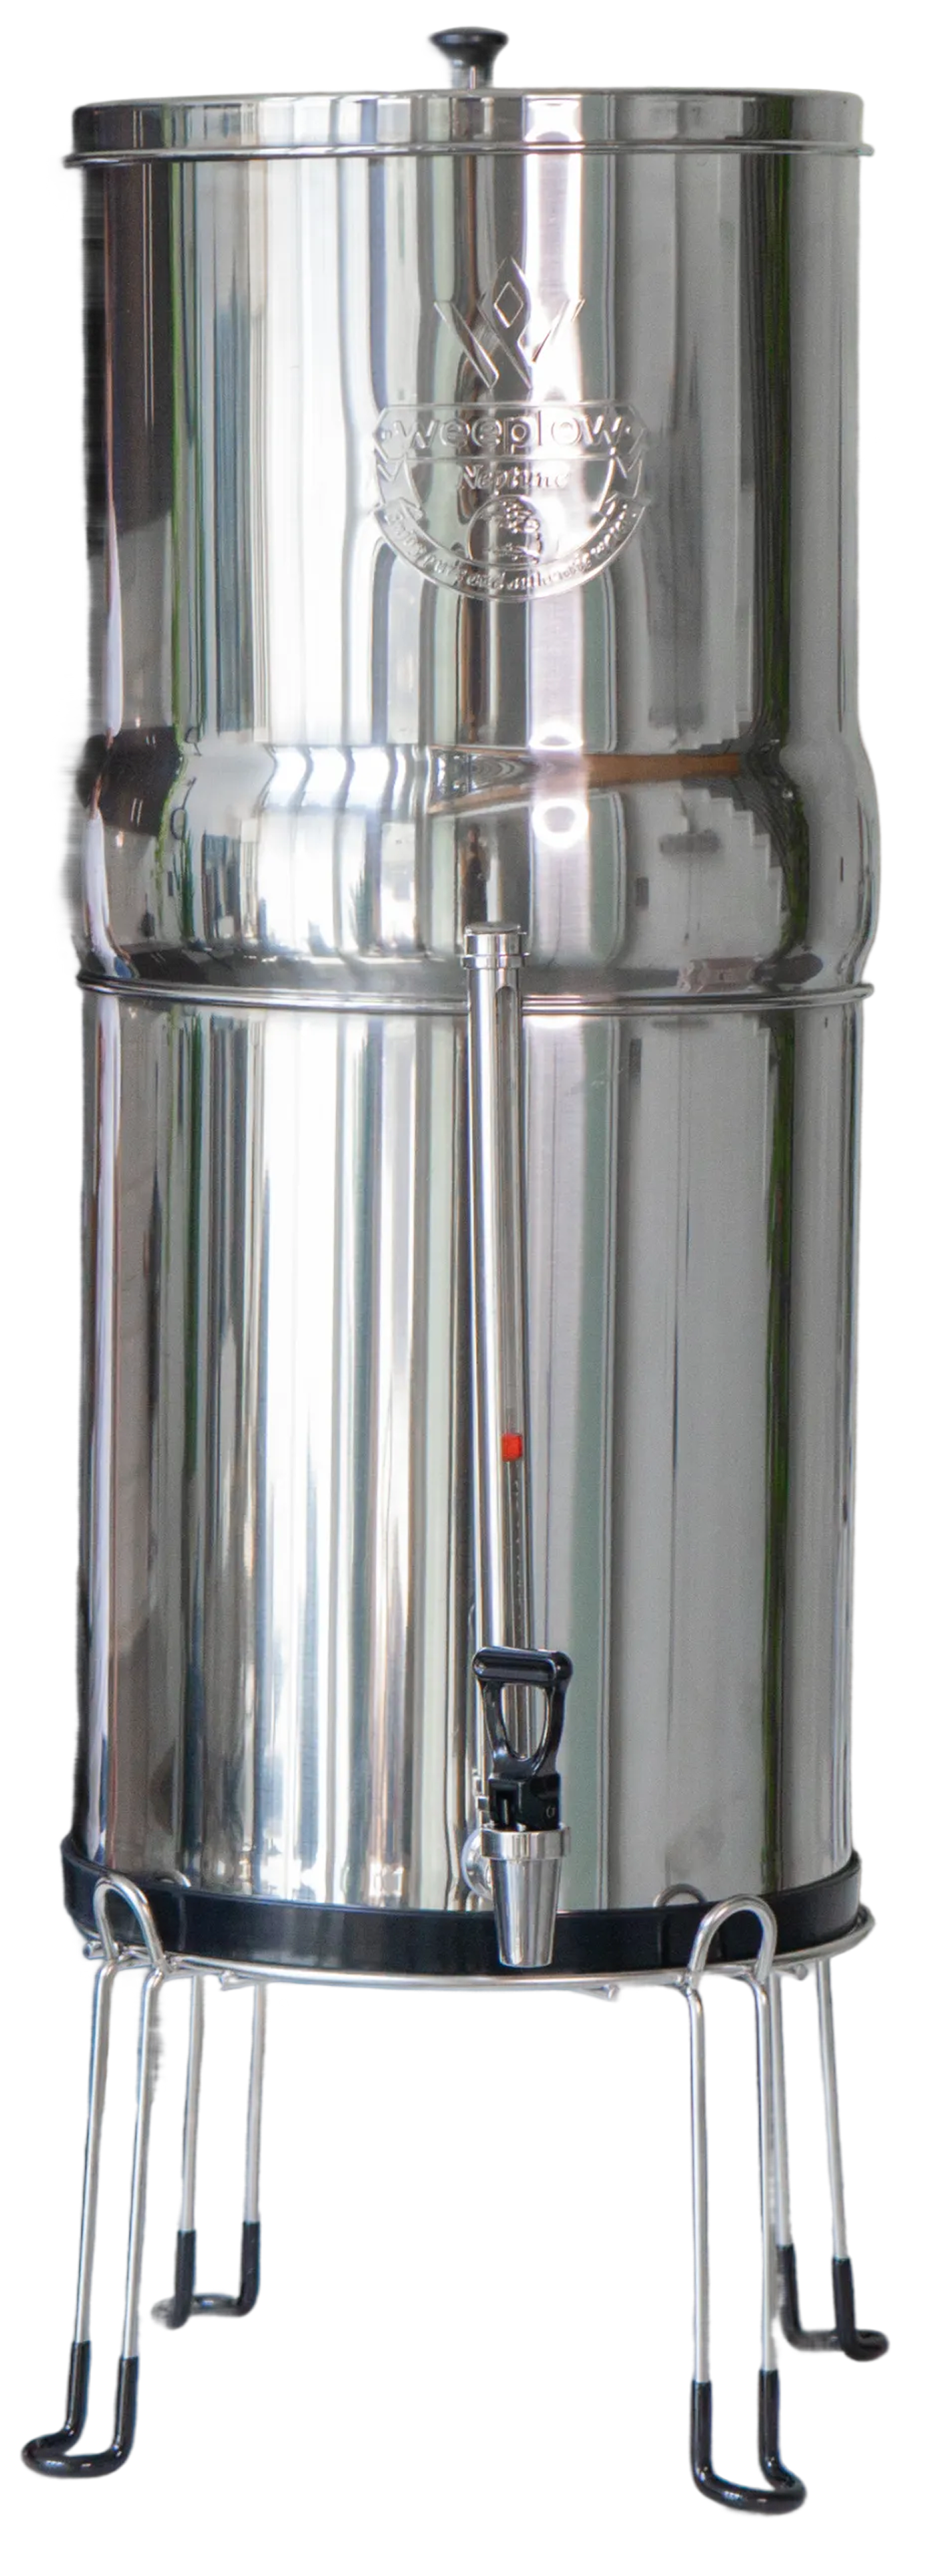
1. Position the lower chamber on the supplied stand or on a stable, level surface.
2. Carefully place the upper chamber onto the lower chamber.
3. Ensure the chambers sit evenly together.
4. Install the lid.
Your Weeplow system is now fully assembled.
Step 5: Run the initial flush
Before drinking filtered water for the first time:
1. Fill the upper chamber with cold water.
2. Allow the water to fully filter into the lower chamber.
3. Discard the filtered water.
4. Repeat this process 2–3 times.
This helps remove any residual manufacturing dust and prepares the filters for normal use.
Step 6: Ready to use
After completing the initial flush, refill the upper chamber and allow the water to filter naturally.
Your Weeplow system is now ready for everyday use.
Replacement Schedule & Care
Replacement Schedule
Your Weeplow O'Pure 2 filter elements are designed to filter approximately 22,000 litres of water.
For most households, this equates to around two years of regular use, although actual lifespan will depend on your water quality and daily consumption.
The stainless steel chambers are built to last and do not require replacement. Simply replace the filter elements when they reach the end of their service life.
Care & Cleaning
A little routine care goes a long way. Keeping your system clean will help maintain both filtration performance and great-tasting water.
When first installing your filters
- Prime each filter thoroughly before use.
- If the water appears cloudy or has an unusual taste, simply prime the filters again until the water runs clear.
Every month
- Wash the lower chamber using warm water and a mild washing-up liquid. This helps prevent dust or other external contaminants from entering your filtered water.
Every two months
- Remove each filter element and clean the outer surface using cold water and either a stiff toothbrush or very fine 3,000-grit sandpaper.
- Scrub one section at a time until you notice a small amount of black carbon on the brush or sandpaper, then continue around the rest of the filter.
- Re-prime each filter before reinstalling it.
After cleaning or re-priming
- Run one or two full filtration cycles and discard the water. This flushes away any harmless carbon fines released during cleaning, ensuring your next refill is ready to enjoy.
With just a few minutes of maintenance every couple of months, your Weeplow Water Filter will continue delivering clean, fresh-tasting water for years to come.
What's Included
Everything you need to get started is included with your Weeplow Earth Water Filter.
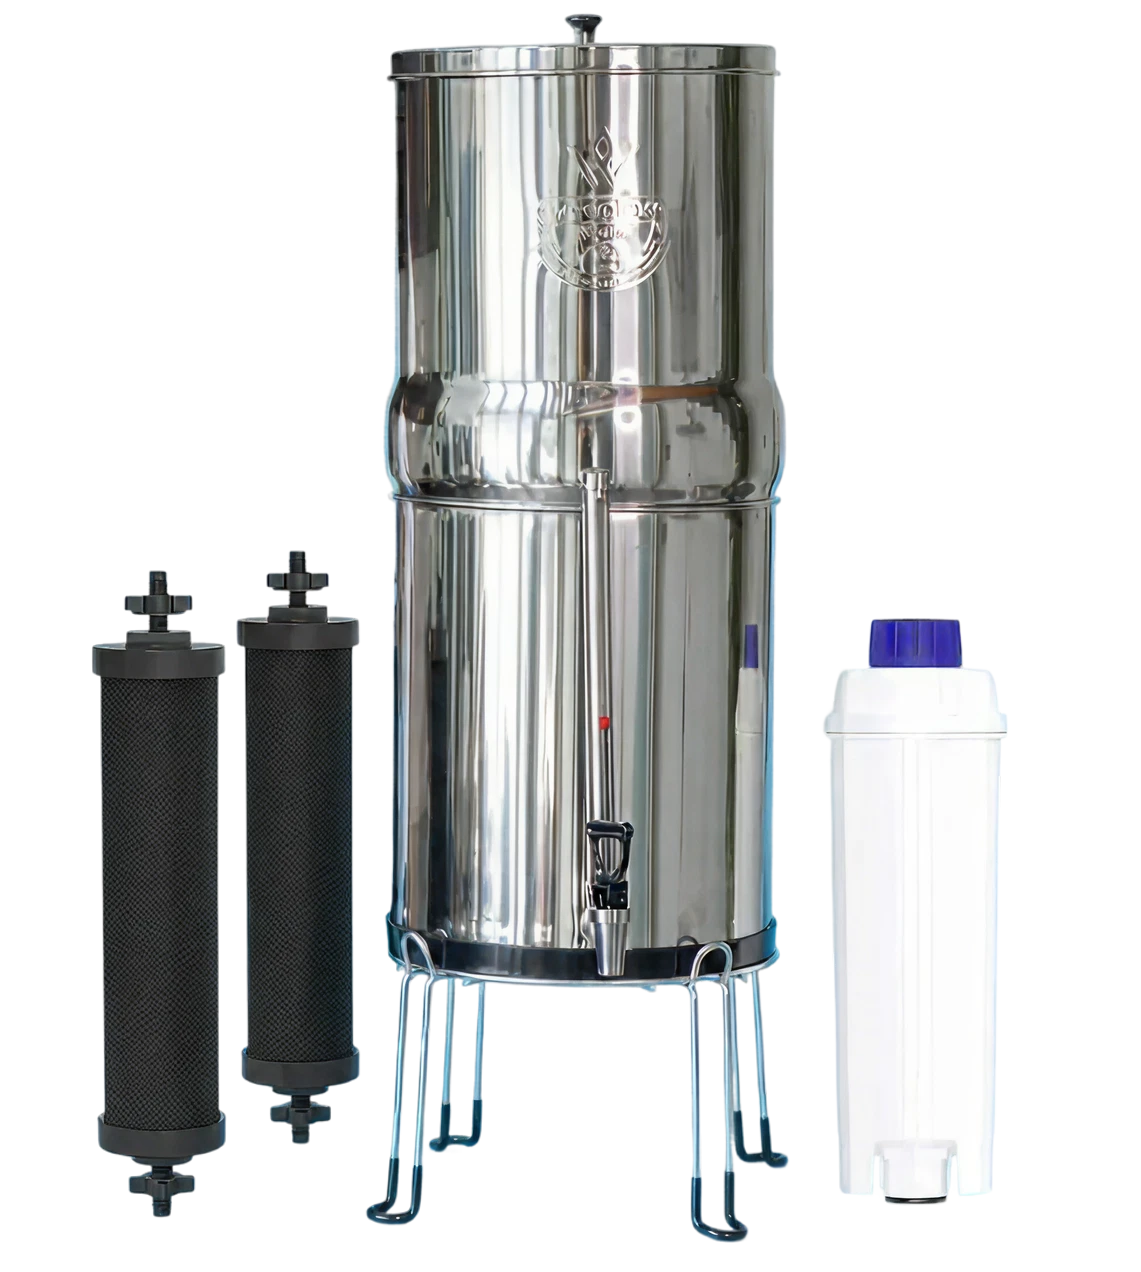
- 2 × AISI 304 stainless steel chambers with lid
- 2 × O'Pure filter elements
- 1 × Stainless steel tap with water level indicator
- 1 × Installation wrench
- 2 × Rubber plugs for unused filter openings
- 1 × Non-slip base
- 1 × Anti-airlock clip
- 1 × User manual
Technical Specifications
| Model | Earth |
| Colour | Silver |
| Material | AISI 304 stainless steel |
| Capacity | 8.5 litres |
| Power | Non-electric |
| Filtration Flow (2 Filters) | 3.8 litres per hour |
| Height (without base) | 50 cm |
| Height (with base) | 66 cm |
| Diameter | 22 cm |
| Weight | 4.2 kg |
Troubleshooting
1. How can I check that my filters are working properly?
▼
If something doesn't seem quite right—perhaps the water is filtering unusually quickly or you're noticing an unexpected taste—the food colouring test is one of the simplest ways to check that everything is working as it should.
Add a few drops of food colouring without sugar or thickening agents to the water in the upper chamber and stir gently until the colour is evenly mixed. The water should become a bright pink or red.
Allow the system to filter as normal, then collect a small amount of filtered water in a clear glass.
The result should be completely clear.
If even a slight tint of colour remains, it suggests that unfiltered water is bypassing the filter elements. In that case, please see Section 4: My Weeplow Water Filter is leaking.
Think of this as a quick health check for your filter—simple, reliable, and reassuring.
2. My filter has become much slower. Do I need to replace it?
▼
▼
Not necessarily.
Over time, your filters naturally collect sediment and other tiny particles from your water. That's exactly what they're designed to do. As those particles build up, the microscopic pores become partially blocked, slowing the flow rate.
In most cases, the filters simply need a little care rather than replacing.
Remove each filter element and gently scrub the outer surface using either:
- a stiff toothbrush, or
- very fine 3,000-grit sandpaper.
Work around the entire surface until you notice a small amount of black carbon on the brush or sandpaper, then move on to the next section.
Once cleaned, re-prime each filter before reinstalling it.
A few minutes of maintenance is often all it takes to restore the original flow rate.
3. There's always a little water left in the upper chamber. Is that normal?
▼
▼
Yes—completely normal.
Towards the end of each filtration cycle, you may notice around 1–2.5 cm of water remaining in the upper chamber.
This happens because the filters rely on gravity. As the water level drops, there is less pressure pushing water through the filters' microscopic pores, so the final portion drains much more slowly.
You may even notice that the system filters considerably faster when the upper chamber is full than when it's nearly empty. That's simply gravity lending a helping hand.
4. My Weeplow Water Filter is leaking. What should I do?
▼
▼
Before making any adjustments, take a moment to identify where the water is coming from. The source usually tells you exactly what needs attention.
Water around the filter stems inside the upper chamber
The wing nuts underneath the filters may not be tight enough.
Tighten each wing nut firmly by hand until it feels snug.
Do not use tools, as overtightening can damage the components.
After tightening, repeat the food colouring test described in Section 1 to confirm the seal.
Water around the spigot
The rubber washer may be loose or sitting slightly out of place.
Unscrew the spigot, check that the washer sits flat against the inside wall of the lower chamber, then tighten everything securely.
Water between the upper and lower chambers
This is usually nothing to worry about.
The two chambers are designed to rest on one another—they are not intended to form a watertight seal. Small amounts of water between them are normally caused by splashing during filling rather than by a leak.
Water underneath the lower chamber
First, check that the spigot is completely dry.
If it is, inspect the lower chamber carefully for any cracks or other physical damage.
5. Why is my TDS reading still high after filtration?
▼
▼
This is one of the most common questions we receive.
A TDS Total Dissolved Solids meter measures the total amount of dissolved material in water. What it cannot tell you is whether those dissolved substances are beneficial minerals or unwanted contaminants.
Our filtration technology is designed to remove contaminants, sediment and many harmful impurities while preserving naturally occurring minerals such as calcium and magnesium.
Those healthy minerals remain dissolved in the water, so your TDS reading may still appear relatively high after filtration.
In other words:
- A high TDS reading does not automatically mean poor water quality.
- A low TDS reading does not automatically mean cleaner or healthier water.
In fact, a healthy TDS reading often shows that your water is still rich in the minerals your body benefits from.
6. Why is my filtered water cloudy or unusual in taste when using a new filter?
▼
▼
There's no need for concern.
New carbon filters can occasionally release tiny, harmless carbon particles known as carbon fines during their first few uses. These may cause the water to appear slightly cloudy or give it a temporary taste.
This is completely normal and will disappear as the filters settle in.
Before drinking the water, we recommend:
- washing both chambers with warm water and mild washing-up liquid;
- running two to three full filtration cycles; and
- discarding the filtered water from those initial cycles.
If cloudiness or an unusual taste continues, the filters may not have been fully primed.
Repeating the priming process usually removes any remaining trapped air and loose carbon particles, allowing the filters to perform as intended.
After a short break-in period, your water should become clear, fresh, and ready to enjoy.